Archive
April 26, 2012
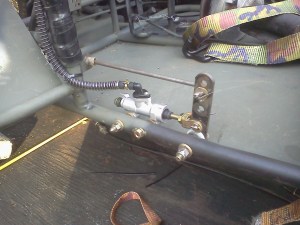
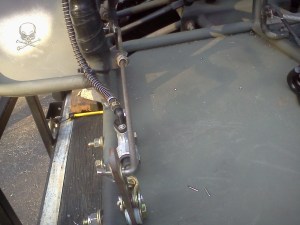
Quick and easy master cylinder mount and linkage. Probably not going to stay here, but, I don’t want to put it behind the pedal right now because future plans include a steering rack and I wouldn’t want this to be in the way. At least now it will be usable for testing purposes.
April 24, 2012
Today, just for shits and giggles, I stopped by a machine shop with my axle. I wanted to see if they could machine the key way they entire length, and whether or not it would be cost effective over buying a new axle. To my surprise, they were able to do it today and it was only $25!! That is one less headache out of the way. So now that I don’t have to wait for an axle, I am on the hunt for some 1.25″ aluminum square stock. I called two local metal supply shops and one didn’t even carry it, and the other wanted almost $30 a foot. I decided to poke around in a scrap yard to see what I could find. They had nothing 1.25″ thick, but I did find two pieces a little over a foot long, 1.5″ wide and 5/8″ thick (I only paid $3 for both pieces!!), so the plan is now to weld the two 5/8″ pieces together and then cut my 1.25″ to length afterwards. I stopped by a friends house after the scrap yard to have him weld them together. I decided to cut them a little longer than originally planned, just so there would be plenty of meat for an extra bolt. I cut two 4.5″ long pieces, (which are now 1.25″ x 1.5″ x 4.5″) for my new (quick and easy) caliper mounting brackets. After drilling one crooked by hand, I decided my best bet was to go to my friend Shawn’s house and have him drill them for me on his drill press. We drilled two 25/64″ holes in each block, for a snug fit of the 10mm mounting bolts.
I clamped the caliper mounting blocks where they needed to be on the kart, and drilled right through them and the axle bearing mount. After they were bolted up, I drilled a third hole, also 25/64″, and added a third bolt for a little more support. That was basically it to mount the calipers … pretty simple.
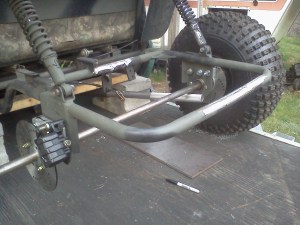 <—– Left Side Caliper and Rotor, MOUNTED
 <—– Right Side Caliper and Rotor, MOUNTED
The caliper on the left side had to be mounted to the rear of the axle, and the right side to the front of the axle, to keep the bleeder screws at the highest point. This is due to the fact that these are SpiderBox calipers, and are identical (there is no left and right).
Until next time …
April 22, 2012
Starting to mockup the brakes to see if I was going to run into clearance issues. Originally, I was going to mount both rotors close together on the left side of the kart, and keep the sprocket on the right (this would make it easier to just make one bracket for both calipers). But, after thinking about it for a little while, I decided that one on either side of the kart would probably be more effective and put less stress / flex on the axle. After a quick mockup, I really didn’t like having the rotors on the inside of the kart frame, or in the center like the original drum brakes, because on the trail I figured it would be much more likely to catch on rocks. So, Mockup #2 –> I placed one rotor and caliper just outside the frame on either side:
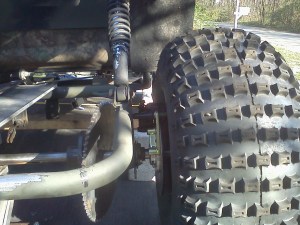 <– Right Rear Side Brake MockUp
 <—- Left Rear Side Brake MockUp
In my opinion, this will serve a couple different purposes. #1, it should put a lot less twisting flex on the axle, #2 they won’t be in the way when driving over rocks, and #3 I will be able to change the rotors quickly and easily without having to remove the axle. The problem I am finding now is in order to mount them like this, I will have to come up with a spacer / bracket approx. 1.25 inches thick, AND sturdy enough to bolt the calipers to. I think the quickest and easiest way will be to get a piece of 1.25 x 1.25 square stock aluminum, about 3″ long for either side, and simply drill holes through it to match the caliper bracket. I can then use grade 8 bolts and bolt through the axle bearing bracket and then the 1.25 inch aluminum block and into the caliper bracket. I am not 100% sure this will be effective, but, it will be cheap and easy to find out, BONUS … NO welding!! Yay!
While I am waiting for a new axle I will also be tracking down some square aluminum stock.
For a breakdown of all parts used please see the “Parts” page. This will include Links and Part Numbers.
April 14, 2012
I had a little time on my hands today … So I decided to cut the factory engine plate off, due to the fact that my new found horsepower ripped the bolts right through the old one. Time for another upgrade! The new motor mount plate will be made of 3/8 thick plate steel. I didn’t weld the new one on the kart yet, for a couple of reasons. I still have to drill the holes for the engine, and I think I am going to send it out to have slots cut in the back part of the plate, so I have some adjustment on the jackshaft. I also found out today that my stock axle is not keyed the full length. I guess I wasn’t paying that close attention last time I had it apart. I will be replacing the axle with one that is keyed the full length, so I have lots of adjustment on exactly where I want to put the new hubs for my new disc brakes.
 <—– Engine Plate and Brakes Removed
 <—– New Engine Plate 3/8 Thick Solid Steel Plate!! (If the engine rips through this plate, I’m in trouble!! LOL!
After looking at the pics, and writing this blog, I am now thinking about mounting the engine plate either directly under the frame (instead of on top like it is in the pics), or possibly welding a small bracket and inch or so lower to mount the plate to. This would drop the engine approx. 2″, thus lowering my center of gravity. I will have to mockup the brakes first to see if I can get away with dropping it that much. So now … I’m waiting on a new axle.
Blog
Click the link above to see what I have done to my Carter “Frankenstein” Kart. I go through everything I have done so far.
Carter aka “Frankestein”
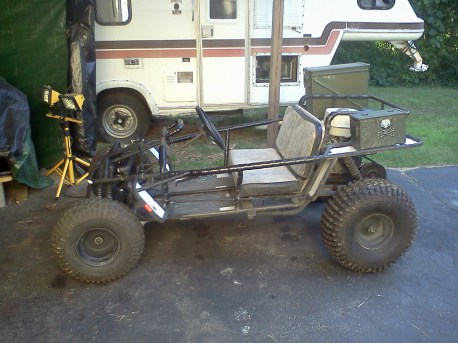
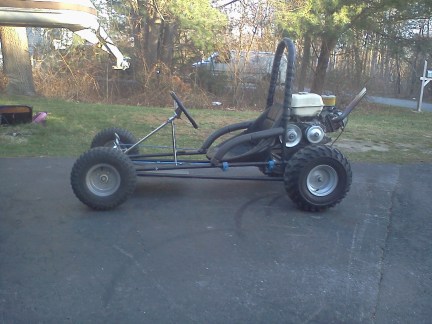
This is my Beast “Frankenstein”. Started out life as a Carter 2910TH. Has undergone many changes and I am still experimenting.
Another Azusa Kart 8hp
This is another Azusa kart. 8hp. Added a torque converter, removed governor, 16″ tires, and roll bar and header added.
SOLD
Fundewheels Kart
This little Funderwheels Kart is for sale. Would be great for someone needing parts. $50 Picked Up in New Bedford, MA
